Challenges of the Edy Detachment is the fourth and final set of downloadable content for the original Valkyria Chronicles.
Overview[]
The content includes six new battles briefed and debriefed by the members of the Edy Detachment, one for each infantry class and a finale combining aspects of the previous trials.
The battles themselves will often have you facing off against a numerically superior Imperial force, usually without tank support and always without command orders.
They take place on one of the maps previously in the main campaign, with brand new enemy aces and capturable imperial weapons.
Each trial is a challenge from a member of Edy's Detachment, however the player is free to choose who is actually deployed onto the battlefield.
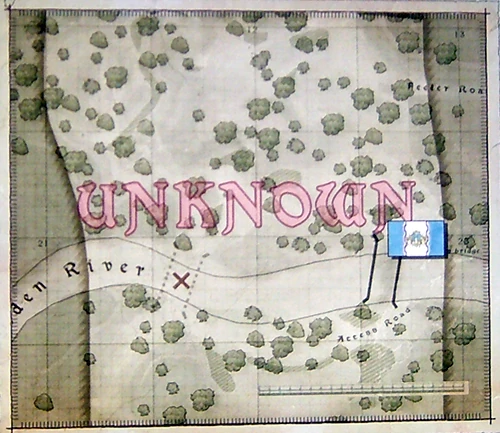
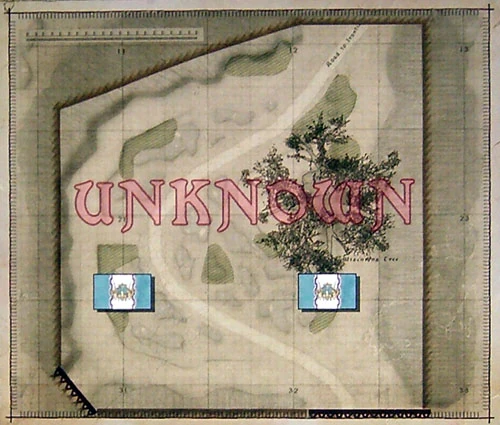
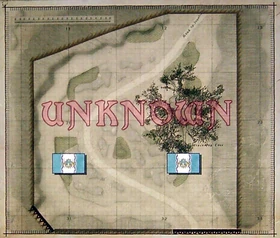
Susie's scout challenge takes place on the first Kloden Wildwood map and involves locating and neutralising an enemy threat while simultaneously defending your base in the lower left of the map.
This challenge is available as soon as Skirmish is available, and is relatively easy to finish in early game, which gives lots of experience plus a late game scout rifle, making early missions easier including later run of this mission (for grinding).
Strategy[]
With her excellent stats and additional CP Alicia is an obvious choice for this mission, however if you're not looking to A rank this mission any scout should be able to complete this mission within 10 - 12 turns.
You may call the other leaders as reinforcements from the base to increase your CP. Rosie can flush out the southmost scout but for fastest speed your main scout should handle all other soldiers.
To start run back over the bridge to the southern portion of the map and take out the scout here, if you don't do this he will take your base at the beginning of the imperial turn and then it's game over. Afterwards swoop south and take out the soldier in the long grass positioning yourself in the grass overlooking the path to the bridge.
In your next turn advance over the bridge and take out the scout patrolling the area, then proceed west parallel to the riverbed and then head north, neutralising the scout patrolling the north west if you can reach him this turn, if not hide in the long grass at the entrance to the area.
Proceed along the north west path and follow it as it curves to the east - do not enter the animal trail from the south, enter it from the north in order to get the drop on the enemy ace Oswald the Gold - like many of the aces in these challenge missions he has very high evasion and is armed with the ZM KAR 8 (g), which is your reward for defeating him.
After defeating the enemy ace proceed east, kill the patrolling scout when you meet him and continue your advance, stopping at the long grass in the south clearing to dispatch yet another scout.
You should have defeated seven enemy soldiers by now including Oswald, now for the final scout. Advance eastwards along the path to the very end of the map, you should see a large boulder at the very edge of the area, behind this is our final opponent. The best way to deal with our last adversary is to throw a grenade aimed just over the boulder - this will blast him out of hiding allowing headshot.
Notes[]
As stated previously Oswald the Gold carries the ZM KAR 8 (g) which deals very high damage, at close range Oswald will kill most scouts in a single volley.
All scouts on the map are elites, make sure your troops are sufficiently levelled to be able handle them without too much fuss.
Orders (and tank support) are unavailable in this mission.
Jann's lancer challenge takes place on the Naggiar Plains North map and involves defeating an armoured detachment of approximately a dozen Imperial medium tanks supported by large numbers of infantry while defending a central base.
Strategy[]
Despite the trial's title try to avoid the temptation to deploy too many lancers on this map, bear in mind that while it is relatively easy to whittle the tanks down to a manageable number, without scouts and shocktroopers to deal with them efficiently you will soon find your base swarmed with enemy infantry. An engineer can come in handy during the first few rounds to give your lancers a healthy supply of ammo and repair damaged sandbag walls.
Position two or three lancers and a scout or shocktrooper to the south utilising the sandbags and trenches for optimum cover. Position another one or two lancer to the north with a scout or shocktrooper and start bombarding the tanks with your lancers as they approach from the north and south, concentrating your fire for maximum efficiency.
You should manage to take out the tanks in the North before they reach the first trench line, however with six tanks in total barreling towards you from the south you stand little chance of stopping them before they smash through the sandbag emplacements. However, with a little maneuvering this will allow you to fire at close range, destroying the tanks by hitting their radiators with your lancers. One shot per tank should be all you need and by turn three you should be replacing two or three lancers with scouts or shocktroopers to deal with the surge of enemy infantry.
Once you feel comfortable defending your central base from infantry advance a couple of shocktroopers south towards the south western base defended by a Medium tank+, killing any soldiers encountered on the way, while doing this creep the remainder of your force covering the southern front carefully to the south eastern base, also defended by a Medium Tank+.
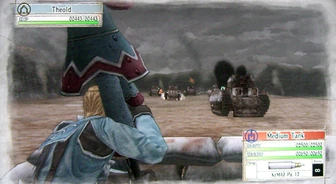
Defending the southern front from the Imperial armoured assault
In the north be careful of Stark the Hawk, the ace sniper on the roof of the tower covering the northern base, he is armed with an ZM SG 5 but will not cause you many problems if you ensure the troops north of your central base are in cover at the end of every turn. When the time comes to attack the northen base take advantage of the large boulders in the east to prevent Stark decimating your advancing infantry.
Charge the southern enemy base with your shocktroopers, kill any enemy infantry you find using their flamethrowers, don't worry about fire from the tanks as their machineguns only cover a 90 degree arc to the rear. Once you are ready destroy the tanks by creeping around them undercover of the base's sandbag walls and open fire on their radiators, two bursts should be enough to destroy the tanks, occupy the both bases and retreat your troops, re-deploying them at the central base when you have the chance, being sure to defeat and remaining infantry beforehand.
Begin the final push by advancing your troops northwards blocking Stark's line of sight from the tower with the boulders in the east, all tanks should now be destroyed so retreat your lancers and replace them with scouts or shocktroopers.
Rush Stark with two or three shocktroopers, attack him from behind or else he'll evade - it will take three hits with a flamethrower to take him down and your reward is the ATR-X3.
By now you should be able to bulldoze the remaining troops in the northern base and take it for you own, watchout for troops in the long grass to the west as you advance however as they can give you an unpleasant surprise if unprepared. Due to this unit in the grass, it is unwise to leave your basecamp unattended.
Notes[]
While it seems logical to deal with the smaller force in the north first they will not cause you too much trouble if you stay on the defensive with a single scout or shocktrooper to keep their advances in check where as the southern reinforcements will start to cause you real problems if not dealt with by the end of turn five.
Orders (and tank support) are unavailable in this mission so you will have trouble using your scouts to target the enemy tank's radiators unless armed with end game rifles like the ZM KAR 7 and ZM KAR 8 (g).
The ATR-X3 (Anti-Tank) is a powerful anti-tank sniper rifle taken from the ace sniper Stark the Hawk atop the tower in the north, while not as powerful as a lance when firing upon tanks you are almost garanteed a hit on their huge lumbering frames.
All troops on the map are elites, make sure your troops are sufficiently levelled to be able handle them without too much fuss.
The missions completed prize is a very weak imperial lance that is abnormally accurate, so its use is for radiator sniping.
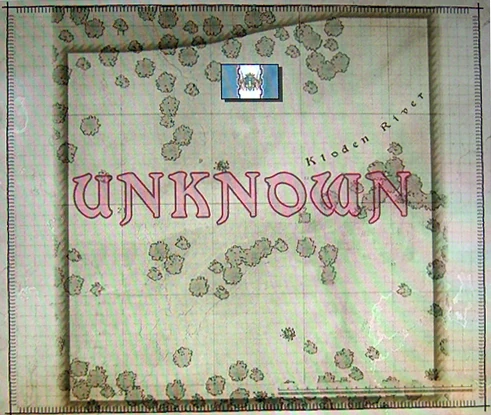
Marina's challenge: The Wildwood II[]
Kloden Wildwood Two Map
Marina's Sniper challenge takes place on the second Kloden Wildwood map and involves eliminating the enemy before they reach an imperial base. The mission will be successful if you either annihilate the enemy force or prevent them from reaching their base for eight turns.
Strategy[]
To start avoid the temptation to deploy two snipers onto the map, without a scout or shocktrooper to intercept the enemy as they move towards the base the challenge will be over very quickly.
For your first unit deploy your best sniper armed with the best rifle in your arsenal, the higher damage the better as you won't be making many long range shots. For the second unit i recommend a shocktrooper (Lynn or Rosie are both excellent choices) armed preferably with the ruhm (available from Selvaria's Mission: Behind Her Blue Flame downloadable content) if not a T-MAG 20.
Start the mission select your sniper, use your first two CP to climb the tower to the east of your starting position and take out both of the imperial snipers on the two watchtowers across the river (one is partially hidden amongst the tree tops so be vigilant), with your final shot take out the sniper to the west of you near the collapsed bridge.
With you final CP select your shocktrooper, run to the edge of the base just past the stockade, you should be able to position yourself so you can dominate the opposite bank while being out of the line of sight of the last enemy sniper by the broken bridge. use your shock trooper to kill the closest scout to the enemy base you are covering.
During the Imperial turn a number of enemy troops will try and get to their base in the west (and cause you to lose the mission), however if positioned correctly your shocktrooper should be able to intercept and take them down before they reach their objective. Scouts will also try and outflank your base along the northern edge of the river but don't worry, they cannot reach you and where your troops are positioned won't be able to fire upon your units.
In your next turn use your sniper and whatever ammo he/she has remaining to take out the closest enemy scouts across the river, it helps here to have a sniper with the Extra Shot potential. If you are feeling confident you can take out the enemy ace Mal the Arachnid from turn two. It should cost you two CP to manoeuvre your shocktrooper into position to the east of the the cabin in the north, kill Mal to claim your reward of a ZMSG 7 (g) sniper rifle and return him/her to a position where he/she can once again cover the southern bank, if you decide to wait for turn three you can also take out the two scouts who have moved along the northern riverbed and are positioned together on the other side of the tank traps to the east of the base, your shock troopers flamethrower will make short work of them.
From turn four you should be able to go on the offensive and mop up the remaining enemy troops. There is a scout on the northern side of the river in an clearing to the west so dispatch him quickly and climb the western tower, across the river on the southern bank you should be able to get a shot off at the final enemy scout who is very well concealed behind a small grassy hillock just past the sandbag emplacement.
Notes[]
Orders (and tank support) are unavailable in this mission.
All troops on the map are elites, make sure your troops are sufficiently levelled to be able handle them without too much fuss.
Mal the Arachnid is an enemy ace sniper hidden to the north east of the log cabin behind your main base, his evasion is lower than most challenge mission aces, however attacking him head on is still unadvised.
Mal drops a ZMSG 7 (g),one of the most powerful imperial SG class sniper rifles, while it lacks the range and accuracy of most Gallian sniper rifles it has greatly improved infantry stopping power and armour penetration.
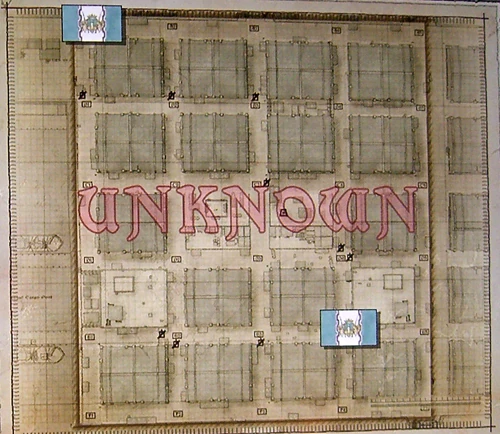
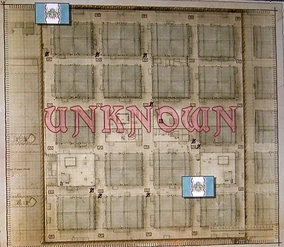
Homer's Engineer challenge takes place on the warehouse district map and involves clearing a route through the imperial occupied docks and warehouses in order to rescue welkin and the disabled Edelwiess then escort it back to safety while driving back enemy forces.
Strategy[]
Deploy an engineer and either two scouts and a shocktrooper or two shocktroopers and a scout, Alicia and rosie are both excellent choices due to the additional CP they bring to the field.
The key to this challenge is the central base, if you take it the enemy will not be able to call for reinforcements meaning that it is possible to wipe the enemy from the map on the way to rescue the Edelweiss and then recover it at your leisure.
Sweep towards the central base in a two pronged pincer movement southwards and eastwards, there is a medium tank directly south of the deployment point which can be avoided and sniper in the far north west who can either be killed by a well placed grenade or once again avoided. Be careful as you move through the side-streets and alleys as the enemy has scattered units hidden amongst the crates, however as they tend to be alone and they shouldn't cause your units too many problems.
A pair of lancers will assault the Edelwiss from the north and west, however as long as you back the tank against the southern warehouse to protect it's radiator and your main force pushes forwards quickly and efficiently they will not have the firepower to destroy the tank and consequentially bring the mission to an end.
The central base itself is defended by three enemy units hidden behind the sandbag walls, two tanks to the east and north east and another shocktrooper stood atop the large shipping container to the west, killing this shocktrooper will allow your units to safely shelter from enemy tank fire and allow you time to set up your attack on their base.
When you have saved enough CP and feel ready take out the units in the base with your shock troopers' flamethrowers then creep behind the enemy tanks and take them out by targeting their radiators. Imperial rifles have excellent armour penetration (especially the ZM KAR 8 (g) captured from Oswald the Gold in the scout trial) and Alicia can take them out in one turn with almost any rife as long as her Valkyria potential activates.
You only have to destroy the tank closest to the central base in order for it to become capturable but any of your units left out in the open will come under heavy mortar and cannon fire from the remaining tank if they are not both destroyed simultaneously.
Be aware when taking the base that a medium tank positioned to the south will be able to target your units if they finish their turn too close to the southern perimeter wall.
Once the base has been captured watch for the enemies retaliation. Set up your units' fields of fire to intercept troops moving from the south and west, after a turn the enemies' counter attack should be over and you should now be free to move your forces southwards and eastwards towards the Edelwiss systematically neutralising any remaining enemy infantry or tanks while using your engineer to clear any anti-tank mines along the way, thusly opening up a safe route back to your base.
Once you have reached the Edelwiss and repaired it's damaged tracks is should take you two full turns for it to reach the it's destination. Strike out west and then northwards taking the first left you come to. If you didn't destroy the medium tank directly south of your starting point on the way to the central base you should find yourself directly behind it with an easy shot at it's radiator.
Rumble onwards to the finishing point to claim your victory, if you forgot to clear the mines along road on the western edge of the map you should be able to squeeze between enough of them to make it home as long as your tracks are at full health.
5-turn way(required for A-rank). This time you'll need Zm. Kar 9(g) (You bet this stage already and going for A) or Zm. Kar 8(g) and a bit of luck. Also equip Rosie with top flamethrower you have.
Deploy Alisia (A), Rosie (R), Largo and an Engineer(K)(K for Knute). Largo is needed only for CP and can be left at starting point.
Clear South *S* way with (R) turn East *E*. Proceed (R) *E*, kill enemy, turn *S*. Proceed *E* way with (A), turn *S*, kill trooper, run *S* to the base crossing. (A) kills trooper on the boxes, then runs behind them. (A) kills trooper from the *S* corner of he boxes, hides back or runs to the previous corner to get healing from (K). (K) takes *S*-then-*E* way, disarming landmines(LM) until reaches base crossing (2CP) You may want to heal (A) if needed. Turn 1 END.
(R) hits the base and burns 2 hiding enemies with FT in 1CP. (A) destroys the *N* tank. Next is *S* (Zm. Kar 9(g) needs no Valkyr. buff) tank, then capture base and proceed *E*-then-*S* to the next tank. You'd have enough movement to take out the last tank with (A). Now (K) comes to stage - first take out sniper *NE* of the base, then proceed *S*, disarming LM. Continue *S* to the last crossing before Edelweiss (T for TANK) and kill an enemy lancer. Last CP is spent to repair (T). Turn 2 END.
(A) turns *E* from crossing and kills the other lancer, then running back to the base, 1CP is usually enough. As you have now base guarded with (A) and (R), just ride (T) the way you disarmed LM earlier. Spend 4 or 6 CP for moving. (K) done its role and not in game anymore.
+ Its possible to drive (T) back to the spot in 2 turns x 6CP (which makes 4 turns total) or you may go hunt another Zm. Kar 9(g) and spend 4 CP per turn for driving and 3 CP for (A). If you go for trophey do not return (A) to the base after killing last lancer.
++ The 2-nd turn is very tricky so i recommend saving before and through it.
Notes[]
All troops on the map are elites, make sure your troops are sufficiently levelled to be able handle them without too much fuss.
This map contains an all but hidden enemy ace scout, Kanazar the Lynx. He is located to the east past the Edelwiss and behind the warehouse in the bottom eastern corner of the map. He is equipped with the ZM KAR 9 (g) which is also your reward for defeating him. Like many enemy aces he has very high evasion and should be attacked from behind or through a smoke screen.
Despite Welkin and the Edelwiss taking an active roll in this trial orders are unavailable.
Edy's Shocktrooper challenge takes place on the Arboreal Wastes map and involves wiping out the enemy force while ensuring none break through your own lines and ensuring Rosie stays alive.
Strategy[]
During this fight you will be fighting a vastly superior imperial force to the north and north west of your main starting position. Deploy two shocktroopers and a scout, as usual Alicia makes an excellent choice for your scout but any scout with intercept damage mitigation potentials like Undodgeable shot or Iron Will excel in this trial. The remaining members of your team should be taken up by your favourite, best geared shocktroopers.
Begin your first turn with the shocktrooper positioned closest to the enemy. The enemy are packed so tightly at the start of the trial that you should be able to take out multiple units with a single attack, so line up your first shocktrooper and let 'er rip - a decent shocktrooper armed with a T-MAG 20, a Mags M30 or the Rhum (if you have it) should be able to take down two units at once and then take cover in the long grass at the foot of the hill in the east, ensuring they are positioned to intercept the enemy as they advance along the path.
With your second shocktrooper move towards the eastern edge of the map just south of the hill, position them against the eastern cliff face with their back tight against it and angle yourself to intercept any stray soldiers from the hill and road to the west, if you're feeling confident you can also take out the sniper west of the large tree on the hill.
Finally take your scout west, keep moving up he hill and stand within co-op range of Rosie, target the sniper to the north of your position and fire past the shocktroopers directly in front of you, a few shots to the head should be enough to neutralise him.
Use whatever spare CP you have to defeat as many enemy units as possible, prioritise the two shocktroopers in front of Rosie - they should be easy kills with assistance from your scout.
By the time the enemy turn has finished their forces should have been significantly reduced by your units intercept fire, proceed to sweep your units northwards systematically eliminating troops hidden in the long grass and ensuring you cover the central road. For the next two turns two sets of enemy reinforcements will appear, two scouts just over the northern crest of the large hill in the east and two shocktroopers and a scout directly north of Rosie - ensure you either eliminate these reinforcements in your turn or set up your intercept fire to cover all possible routes around your units also ensure all points on the main path through the centre of the map are covered by at least one unit.
The enemy ace shocktrooper Col. Nonnenkof is hidden in the long grass north of the large hill that dominates the east of the map, be very careful to engage him from behind as he has very high evasion and is armed with a ZM MP X3 (g) which will rip your units to pieces if he gets a shot off at close range.
With Col. Nonnenkof defeated in the north of the map the trail should be complete, if not be sure to check the patches of long grass through the map for stray enemy units.
Notes[]
Orders (and tank support) are unavailable in this mission.
All troops on the map are elites, make sure your troops are sufficiently levelled to be able handle them without too much fuss.
Col. Nonnenkof is an enemy ace Shocktrooper hidden in the long grass to the north of the large hill in the east of the map, like many enemy aces he has very high evasion and is armed with a ZM MP X3(g), which is also your reward for defeating him, the ZM MP X3 (g) is a incredibly high power, innaccurate, short range, 25 shot machinegun that is really useful for ace slaying and defending camps, It is undoutably the most powerful machinegun in game.
The Edy Detachment Challenge: Barious Ruins[]
Barios Desert Map
The final challenge has a simple premise, get your tank from one side of the map to the other the challenge stems from those hidden details we all love.
For firstly, your most logical path is blocked by the ruins which must be cleared using your lancers. Secondly the route has also been heavily mined and has a strong imperial force waiting to ambush you. Lastly, the enemy have brought along some big guns in the form of a heavy mortar which will bombard the battlefield each turn.
Strategy[]
Firstly try to pick a flexible and well mixed force, you will need to compliment your regular squad with both Anti-Armour and Anti-Infantry potential. I recommend a mix of Shocktroopers, Snipers & Scouts with an Engineer and at least one Lancer.
To start advance south taking out the enemy soldiers as they present themselves, when the initial Imperial force has been dealt with send your engineer to clear a path through the minefield and your lancer to blast the wall blocking your tank's path out of it's way (note on a speed run it is possible to maneuver the Edelweiss through the minefield without having to clear a path through, just be careful).
From here on it is simply a case of advancing towards your objective - be sure to support your tank with infantry, never advance too far ahead of your main force and remember that while your tank is formidable, it is not invincible.
Like the other challenges in the series there is another Aces amongst the imperial forces here, his name is Mitz the Agent and he carries the ATR-X3 AT Sniper Rifle which is your reward for defeating him.
It only takes three full movements (Once every turn for A-rank) for the Edelweiss to reach the destination. In the first turn, The Edelweiss needs to be moved under the first ruin fragment, within the blast zone to prevent the fragment from falling. Doing so however will make the Edelweiss vulnerable to the two entrenched lancers in the top right corner (It is possible to kill these two though from a single, well positioned flamethrower).
Notes[]
Orders are unavailable in this mission.
All troops on the map are elites, make sure your troops are sufficiently levelled to be able handle them without too much fuss.
Like most aces in the challange missions Mitz has very high evasion and will almost always dodge an attack launched in from in front of him, however there is a trick to make taking Mitz down with little effort which is to use your tanks smoke launchers to blind Mitz and then launch your attack through the smoke.
Trivia[]
The only character from Edy's detachment who doesn't have their own challenge is Lynn, the detachment's other shocktrooper aside from Edy.
The sixth and final trial is the only time the Edy detachment has fought along side the Edelweiss.


